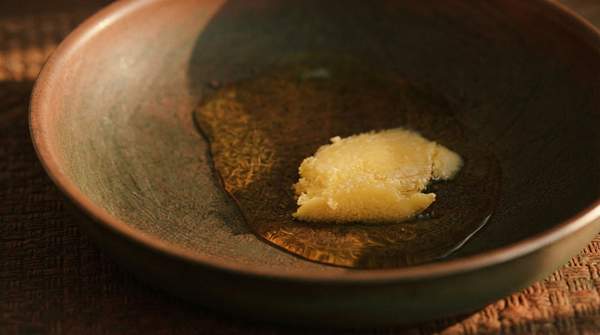
You can make ghee in your own kitchen with one ingredient and about twenty minutes of mostly unattended simmering: melt unsalted butter slowly, let the water cook off, brown the milk solids, and strain them out. What remains is nearly pure butterfat — a cooking fat that, according to guides from Downshiftology and Tasty Yummies, tolerates high heat without burning, keeps for months at room temperature, and carries a nutty richness that plain butter can't match. Here is how to do it, and the science behind each stage.
What Is Ghee and How Does It Differ from Butter?
Regular butter is a mixture: butterfat, water, and milk solids — the lactose and casein that give dairy its flavor and its complications. Ghee strips away everything except the fat. A food-safety documentation template from foodsafe.ca describes the process plainly: unsalted butter is heated to remove water and filtered to separate the milk solids, yielding "a product that is almost 100% BF" — butterfat.
The distinction from clarified butter comes down to time and heat. Tasty Yummies' guide notes that ghee takes a lengthier cooking process: the milk solids are not just removed but browned in the fat first, then strained out, which gives ghee its slightly nutty taste. Clarified butter is the same idea stopped earlier. Because the solids are gone, ghee is also a practical option for people who are lactose- or casein-intolerant but still want a buttery flavor.
The Science Behind Ghee's Superior Cooking Properties
Why does removing water and milk solids change how butter behaves under heat? Because those solids are the first thing to scorch. Downshiftology's recipe guide puts it simply: "Regular butter can smoke and burn on the stove (due to the milk solids), but ghee doesn't burn!" An Instructables project written for long-term butter storage adds the numbers, comparing ghee's smoke point of roughly 485°F against butter's 250–300°F — a difference wide enough to change what you can cook.
Water matters too. Butter's water content must boil off before the fat can get truly hot, and the exact proportions of fat, water, and solids vary by brand and type, as Tasty Yummies cautions — cheap butter contains more water and "tends to burn faster." With the water gone, ghee behaves like a stabilized rendered fat. That heat tolerance is what makes it Downshiftology's go-to for sautéing and frying, and what led RecipeTin Eats' Nagi to call it the fat of choice for traditional Indian curries, crispy potato rosti, and quick Hollandaise.
Ghee vs. Butter: A Quick Comparison for Your Kitchen
The table below pulls the practical differences together so you can decide fat by fat which one a recipe actually needs. The pattern across every row is the same: butter's water and milk solids are what limit its heat tolerance, its shelf life, and its suitability for dairy-sensitive cooks.
| Property | Regular Butter | Ghee |
|---|---|---|
| Composition | Butterfat plus water and milk solids (lactose and casein); proportions vary by type and brand | Nearly 100% butterfat — water and milk solids removed |
| Smoke point | Lower, roughly 250–300°F; milk solids burn first | High, around 485°F; suitable for frying and roasting without burning |
| Lactose & casein | Present, problematic for sensitive individuals | Removed with the milk solids |
| Shelf life & storage | Requires refrigeration; shorter shelf life due to water and solids | Room temperature for a few months; refrigerated up to a year |
| Flavor | Familiar buttery, but scorches easily | Nutty, from browned milk solids; doesn't burn unless heated excessively |
Read the table as a decision rule: for pan-frying, roasting, and stir-fries at high heat, or for dairy-sensitive diners, ghee wins; for spreading or gentle baking where mild butter flavor matters, regular butter is still fine.
Step-by-Step Guide to Making Ghee at Home
Start with unsalted butter, and start with more than you want to end up with. Tasty Yummies advises beginning with about 25% more butter than the ghee you're after, because the process boils off water and strains out solids — one pound of butter yields roughly 1½ cups of ghee.
Melt the butter over low-to-medium heat and let it simmer. The first visual cue is foam: the water inside is boiling away as the fat clarifies beneath it. The foodsafe.ca documentation describes the controlled heat behind this stage — as most of the water evaporates, heating is kept around 103°C to avoid charring the solids-not-fat and developing bitter flavors. Skimming the foam helps you see what's happening.
Once the water is gone and the liquid turns clear and golden, watch the bottom of the pan. The milk solids there will brown; this is the stage that separates ghee from plain clarified butter and builds its characteristic nutty flavor. The foodsafe.ca document notes the final temperature is raised to between 105°C and 118°C with constant agitation to drive off the water bound to those solids. Browned, not blackened, is the goal.
Finally, strain the fat through a fine sieve or cheesecloth into a clean, dry jar, discarding the solids. What you've done, step by step, is remove water (so there's nothing to boil and nothing for microbes to grow in) and remove the proteins and sugars that would otherwise scorch. The finished ghee should be golden and clear, with the browned solids left behind in the strainer.
Maximizing Ghee's Shelf Life: Storage Best Practices
Ghee's stability is not a happy accident. By removing water, you remove the medium microbes need, and by removing milk solids, you remove components that spoil — the reasoning both Tasty Yummies and Downshiftology give for ghee outlasting butter. Downshiftology's storage guidance is concrete: keep it in a dark, cool place at room temperature for a few months, or refrigerated for up to a year. Always use a clean, dry utensil so you don't introduce water or food particles.
The one enemy that remains is oxidation, which a technical review in the journal literature identifies as the limiting factor for ghee's shelf life over time — the same reason researchers have tested additives like polyphenols and phospholipids to extend it further. For a home cook, that means an airtight container and minimal light exposure are your best tools; an off, rancid smell is your signal that a batch has oxidized past its prime.
Embrace Ghee for Versatile, High-Heat Cooking
Making ghee at home and using it in your cooking gives you a more versatile fat — one built for frying and roasting that plain butter can't survive — plus a dairy-light alternative with a shelf life butter can't touch. Successfully making ghee at home and incorporating it into your cooking allows for greater versatility, especially for high-heat applications, and provides a dairy-friendly alternative with extended shelf life.
You'll know your batch succeeded — and that your storage is working — by two observable signs: golden, clear ghee with browned milk solids left at the bottom of the pan after straining, and a jar that remains stable at room temperature for several months. If both check out, you've replaced a refrigerator-bound fat with a pantry staple that handles the heat.
Sources
- How to Make Ghee - Easy Homemade Ghee Recipe — Downshiftology
- How-to Make Ghee at Home — Tasty Yummies
- Foodsafetyplans
- Home-Made Ghee (Long-term Butter Storage) — Instructables
- How to make Ghee and Clarified Butter (same thing!) — RecipeTin Eats
- Recent innovations in functionality and shelf life enhancement of ghee, clarified butter fat - PMC